3. Settings
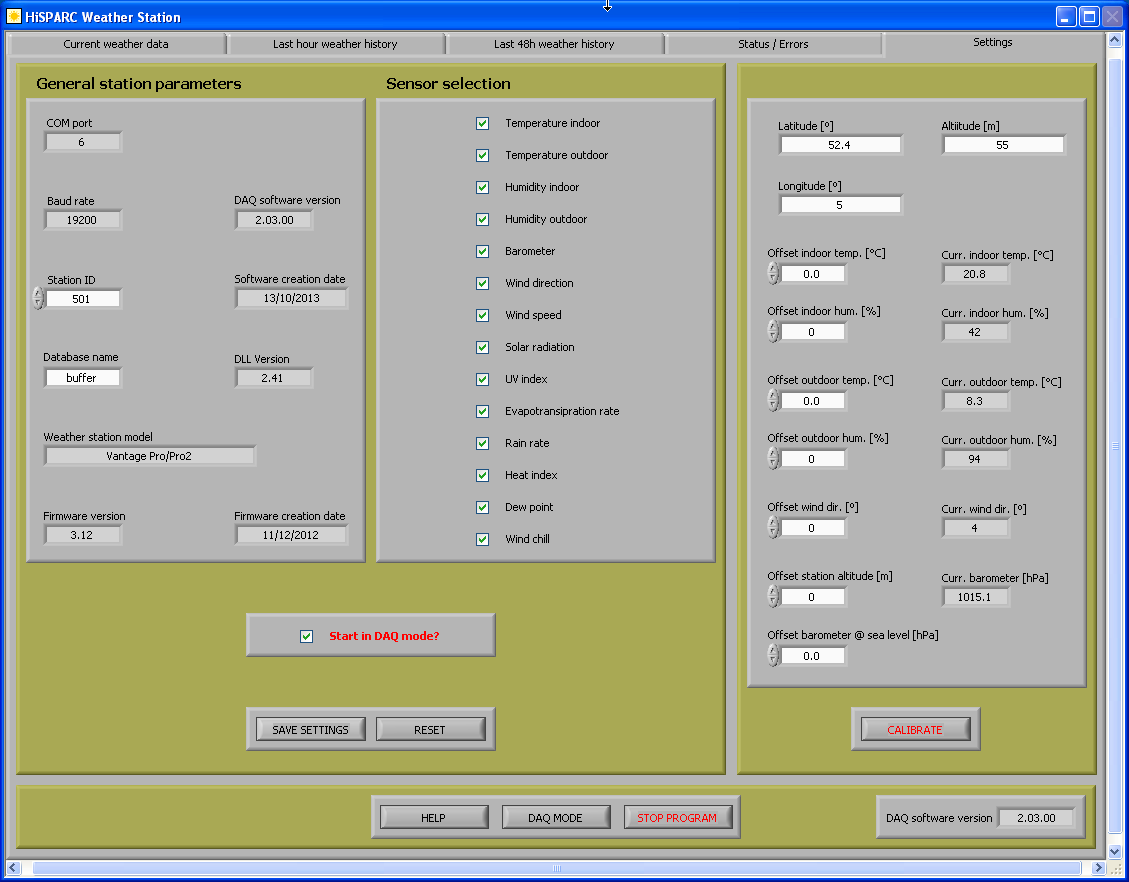
Before sending data to the central database can start, that is, before switching to data acquisition mode (‘DAQ Mode’), the station settings have to be chosen. Next to providing some general information, several switches can be activated at the ‘Settings’ tab. A screenshot of this screen is shown below.
The upper left block gives:
- COM port number and baud rate (when a serial connection is active) or USB device number (direct USB interface).
- DAQ software version (the version of the software you are actually running)
- The date at which this version of the software was created
- Station number (should correspond with the number of your cosmic ray set-up - when present -)
- Name of the intermediate data store on the local pc (standard: buffer)
- Version number of the Vantage software library to address the console (DLL)
- Weather station model
- Firmware version and release date
Depending on the weather station configuration, a subset or all sensor types can be selected (central block). Note that derived quantities can only be calculated when the (outdoor) sensors are connected (for example wind chill: outdoor temperature and wind speed). The configuration is only accepted (and stored) after pressing the ‘SAVE SETTINGS’ button.
3.1. Calibration
Several sensors can be calibrated. However, his option should be handled with care. Depending on hardware and/or firmware version sometimes unpredicted behaviour is observed. Press ‘CALIBRATE’ to write the new values into the weather station console and store the new values in the initialisation file. After using the calibration procedure (only the sensors for which the calibration values have been changed will be affected!), check whether the correct values have been loaded into the weather station console (consult the Davis user manual).
Executing ‘RESET’ will re-initialise all settings to default and will clear the calibration values.
3.2. DAQ Mode
To ensure that next time the pc (automatically) starts the weather station software in ‘DAQ mode’, to check the ‘Start in DAQ mode?’ box.
After switching to DAQ mode, this tab will no longer be visible; settings can only be changed when not running in DAQ mode!

